Homemade Built Puff Protein Bars are pillowy marshmallow clouds coated in chocolate! It’s hard to believe they’re made with such simple ingredients and can be made dairy-free, gluten-free, refined sugar-free (if you want it to be), and—best part—only needs a handful of ingredients! We are leveling up snack time!
This copycat Built Puff protein bar recipe is soft, marshmallowy, and dipped in rich chocolate, just like the original! Perfect for post-workout fuel, afternoon pick-me-ups, or let’s be real… late-night dessert.
Love a copycat recipe? Try my copycat KIND frozen treat bars!
Why You’ll Love These Homemade Built Puff Protein Bars
- Customizable – dairy or gluten-free? I gotchu! These are super customizable and can even be made refined sugar-free.
- Versatile – switch up the flavor of protein shake, switch up the chocolate, etc.
- Minimal ingredients – easy, peasy!
- Tastes like a candy bar – but with that protein boost you love!
Recipe video
How to make homemade built puff protein bars
Full recipe is in the recipe card at the bottom of the post!
Tools needed
- Stand mixer or hand mixer – I’ve had a Kitchenaid stand mixer for years and couldn’t recommend it more, but here is a more affordable option with great reviews!
- Loaf pan
Ingredients You’ll Need
- Protein shake – use your favorite! I try to look for ones that don’t have added sugar/are low sugar and don’t contain any artificial flavors or ingredients.
- Grass-fed gelatin – this is what creates that fluffy marshmallow texture! It’s also incredibly rich in amino acids and benefits your gut health. Quality is VERY important. Look for a grass-fed gelatin.
- Honey or maple syrup – this is optional. If your protein shake isn’t sweet, i’d add a few tablespoons of sweetener!
- Chocolate chips – used to create that crunchy chocolate shell coating. If you want a sugar-free option, I highly recommend ChocZero or Lily’s! Hu Kitchen is my fave!
- Coconut oil (to help the chocolate set all glossy + perfect)
Optional but fun: a pinch of flaky sea salt on top. Chef’s kiss!

Steps to Make Copycat Built Puff Protein Bars
- Whip it up – Using a food processor or hand mixer, you’ll start by whipping together the protein shake, optional sweetener, vanilla extract, and gelatin. It’ll take a few minutes but will turn into a fluffy marshmallow fluff texture. I highly recommend using a stand mixer, as it’ll speed up the process greatly!
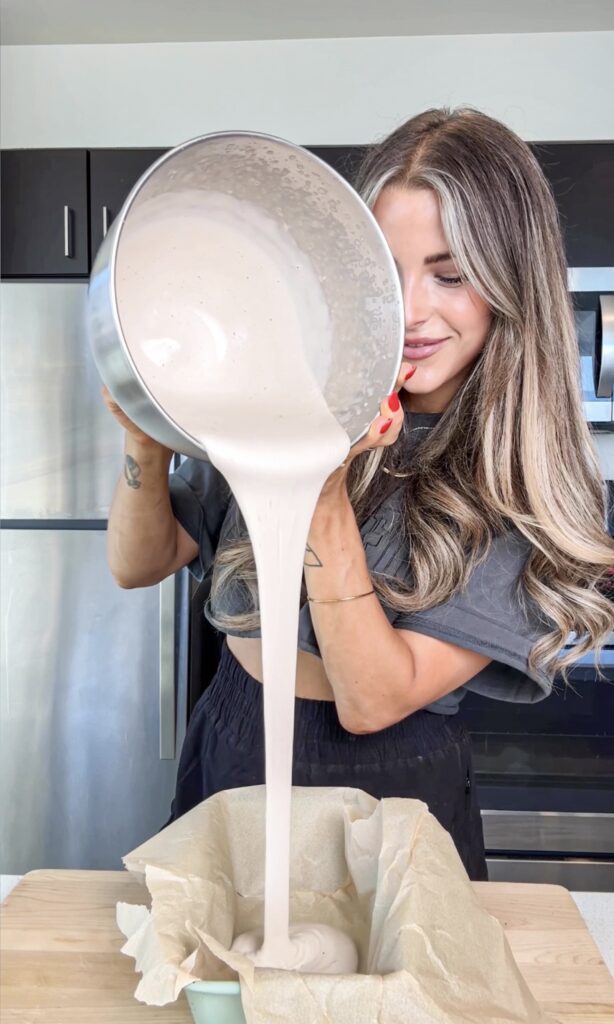
- Chill – Pour the mixture into a parchment-lined pan and pop it in the fridge to set.
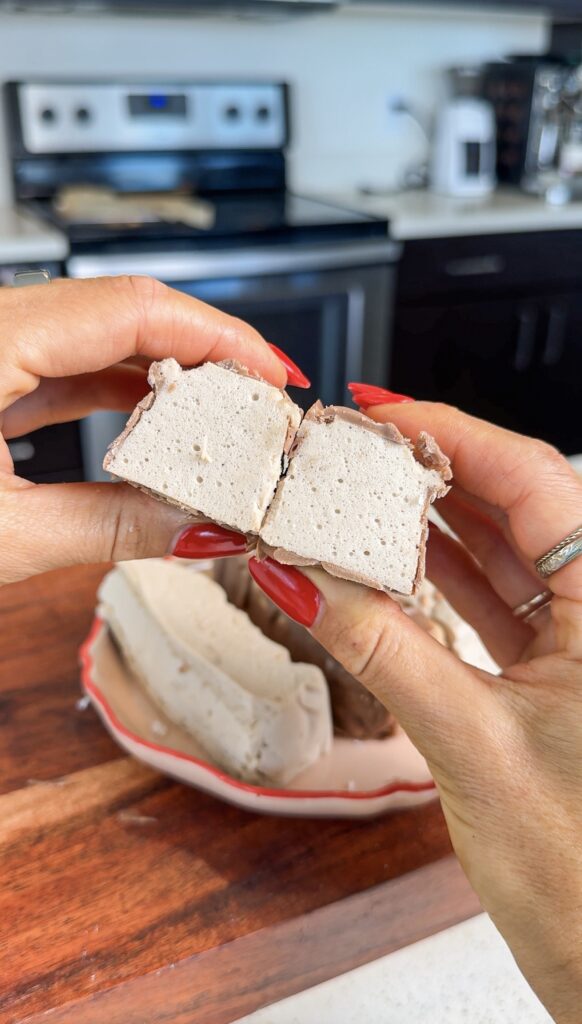
- Chocolate dip – Melt your chocolate with a little coconut oil, then dunk or drizzle your bars until fully coated.
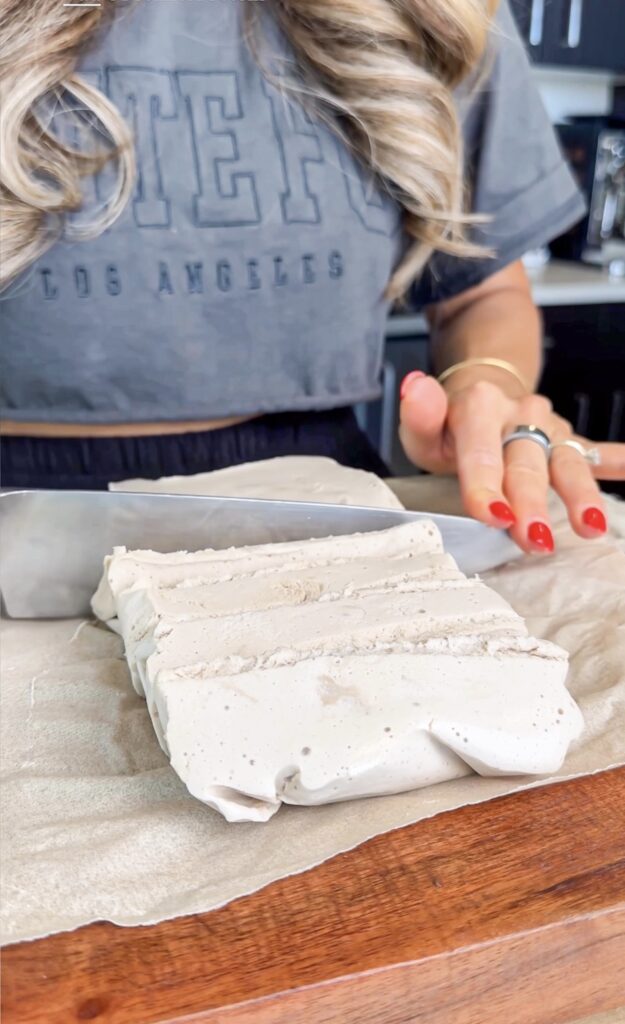
- Set + snack – Let them firm up in the fridge (the hardest part = waiting). Slice into bars and enjoy!
Tips for the Perfect Built Puff Dupe
- Don’t skip the chill time—this helps your bars hold together before the chocolate dip.
- For extra “candy bar” vibes, try sprinkling crushed nuts on top before the chocolate sets.
Recipe variations
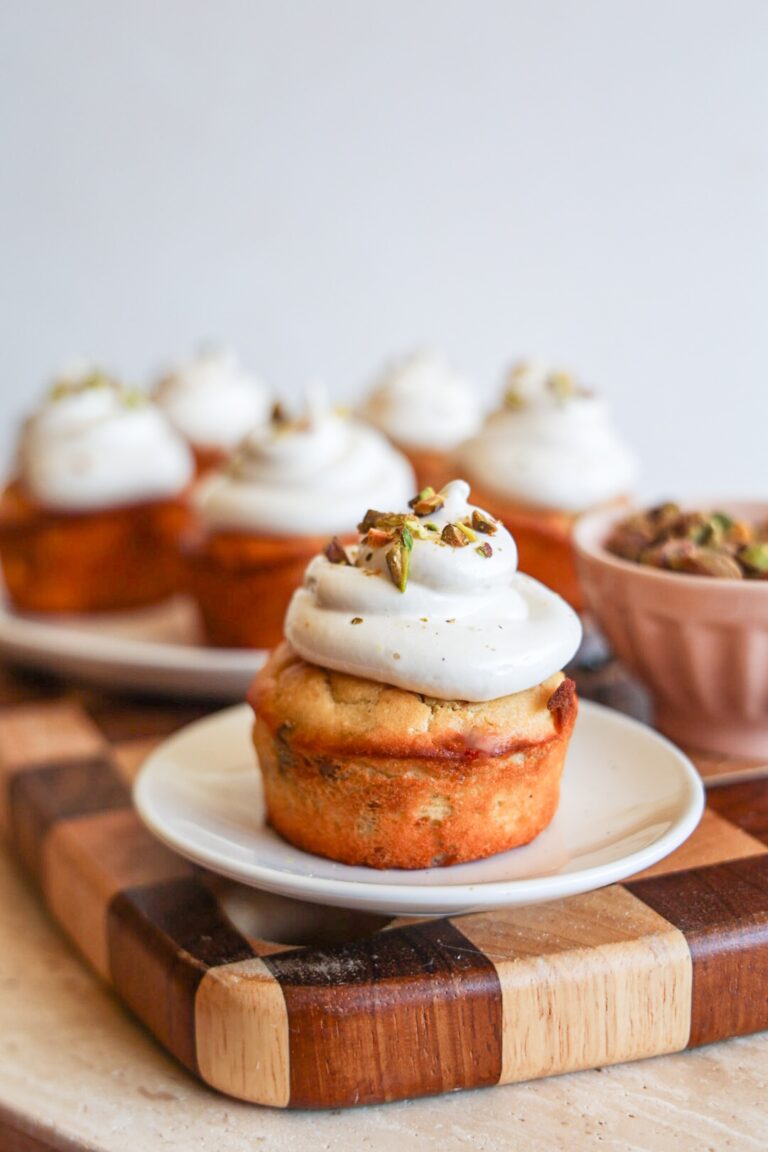
- White chocolate coating – dip the bars in melted white chocolate! Top with pistachios for a yummy combination!
- Use different protein shake flavors – strawberry, chocolate, vanilla, coffee, etc. They’re all delicious!
Storing Your Bars
Keep your homemade Built Puff bars in an airtight container in the fridge for up to a week (if they last that long!). You can also freeze them for up to 2 months—perfect for meal prep or your emergency snack stash!
More high protein recipes to try
- Cookie dough ice cream sandwiches
- Frozen protein S’mores
- No-bake cookie dough bars
- Healthy snickers bites
- Strawberry frozen S’mores
- Healthy strawberry shortcake cups
- Strawberry shortcake protein ice cream (ninja creami)
- Dilly bars

Homemade Built Puff Protein Bars
Ingredients
- 2 cups protein shake of choice
- 4 tbsp grass-fed gelatin
- 2 tbsp honey or maple syrup (optional)
- 2 tsp vanilla extract & pinch of sea salt
- 1-2 scoops of your favorite protein powder (optional)
- 1 cup chocolate chips
- 1 tbsp coconut oil or avocado oil
Instructions
- Add the protein shake, vanilla, (and maple syrup if using) to a small saucepan and sprinkle the gelatin on top. Let bloom for 5-10 minutes. Then place on the oven on low and whisk the mixture periodically until it thickens a bit.
- Pour this mixture into the bowl of your stand mixer and let cool for 5-10 minutes – it should be warm but not super hot.
- Turn the mixer on low at first then turn to high after a minute or so, letting it whip for 10-20 minutes until it is thick enough to resemble marshmallow fluff. Add in the protein and whip a little longer. Careful not to over-whip or it'll get too thick. When you remove the whisk from the bowl, it should stick to it but still be drippy.
- Pour the mixture into a lined loaf pan. Place in the fridge to firm up for an hour or two.
- Once firm, remove the parchment paper from the pan. Cut the marshmallow mixture into bars. Melt chocolate in a small bowl with the coconut oil until smooth.
- Dip each bar and place on a parchment-lined baking sheet. Place back in the fridge for an hour or so or the freezer for 30 minutes before moving to an air-tight container. Store in the fridge.


Could these be made with marine collagen instead of beef collagen? Is the amount still the same if marine collagen is used? I have an allergy to mammal products, and coconut. What oil could replace coconut oil in the recipe?
Hi Amanda! Do you mean the grass-fed gelatin!? Unfortunately that’s needed to create the marshmallow like texture 🙁 As for the oil, avocado oil would work!
Nutrition facts?
Hi there! So I always recommend plugging the recipe into my Fitness Pal (or another similar app) with the brands you use for the most accurate numbers! (:
How many servings does this make? (how many bars should you cut them into?)
It’s honestly totally up to you! You can make small bites or larger bars! I made about 10 smaller ones!
When you say “protein shake of choice”, do you mean a liquid base to mix the gelatin into? Thanks
Hi Morgan! Yes! The protein shake also adds a ton of protein to the recipe to make them have a decent amount of protein! (:
Would this just not be protein powder mixed with milk or water? Or is it a premixed one like fair life or something similar
Hi Rylan! You could definitely try that, although I haven’t and am not sure if it’ll affect the recipe at all. I’ve found the protein shakes (store-bought) work great though so yes, Fair Life would be a great option!
I’ve used powdered protein mixed with almond milk. It works great!
Hi Laura! Yay, so good to know! <3
This looks so good! What a great combination of flavors!
Thanks for sharing! Does it keep long?
Can I use collagen in place of gelatin?
Hi Yaz! I’m so sorry, but the gelatin is what whips the mixture into a marshmallow-like texture! It won’t work with just collagen 🙁
could I use agar agar or fruit pectin in place of the gelatin?
Hi Ben!! I haven’t tried it, so I can’t say how they’ll turn out! :/
Not sure if I’m doing something wrong but mine keep coming out super dense. Any help is appreciated!
He Bre! Do you mean the marshmallows are dense? Because they definitely should be to some degree! They should be marshmallow texture though (soft on the inside). What protein shakes are you using and did you add protein powder? This could possibly be the culprit!