If you are a snickers fan looking for a rich, luscious, refined sugar-free dessert, this vegan snickers cheesecake is for you! It’s packed full of all the snickers flavors, with creamy peanut butter, gooey caramel, and chocolate but made gluten free & refined sugar free!
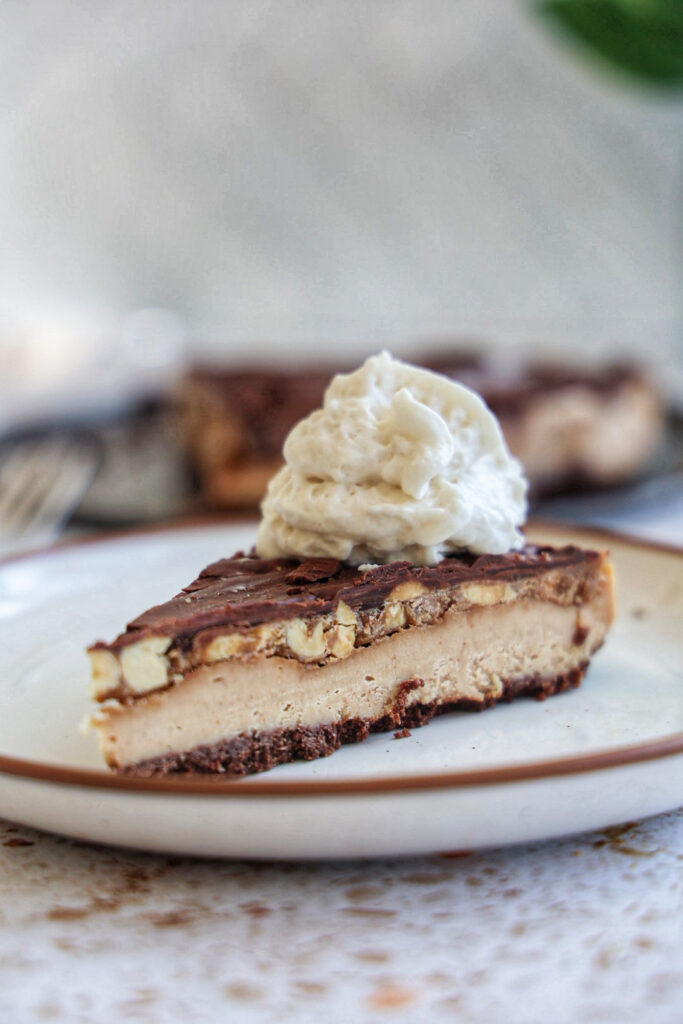
If you’ve been following me for awhile now, you’ll know that if I had to choose my all-time favorite dessert, it would be a raw vegan cheesecake. Raw cheesecake was what made me fall in love with whole-food baking, or in this case.. “un”-baking? When it comes to dessert, if there’s a snickers option.. i’m 100% choosing it!
This particular cheesecake isn’t raw, because of the caramel sauce, but I tried to stick to the premise of using more whole-food ingredients, without added refined sugar!
What is a vegan cheesecake made out of?
There are many different ways you can make a raw vegan cheesecake! My favorite is using raw cashews, soaking them so they soften and blend easier, and use those as the base. I know some love using tofu, coconut yogurt, or even just nut butter as the base.
For this vegan snickers cheesecake, we’re going to use peanut butter as the base. This way, you don’t have to buy and soak cashews – it’s just a little bit easier!
Why you’ll love this vegan snickers cheesecake
- It’s so rich and delish! You could serve this to anyone and I can almost guarantee that they wouldn’t know it was vegan or refined sugar-free, unless you told them!
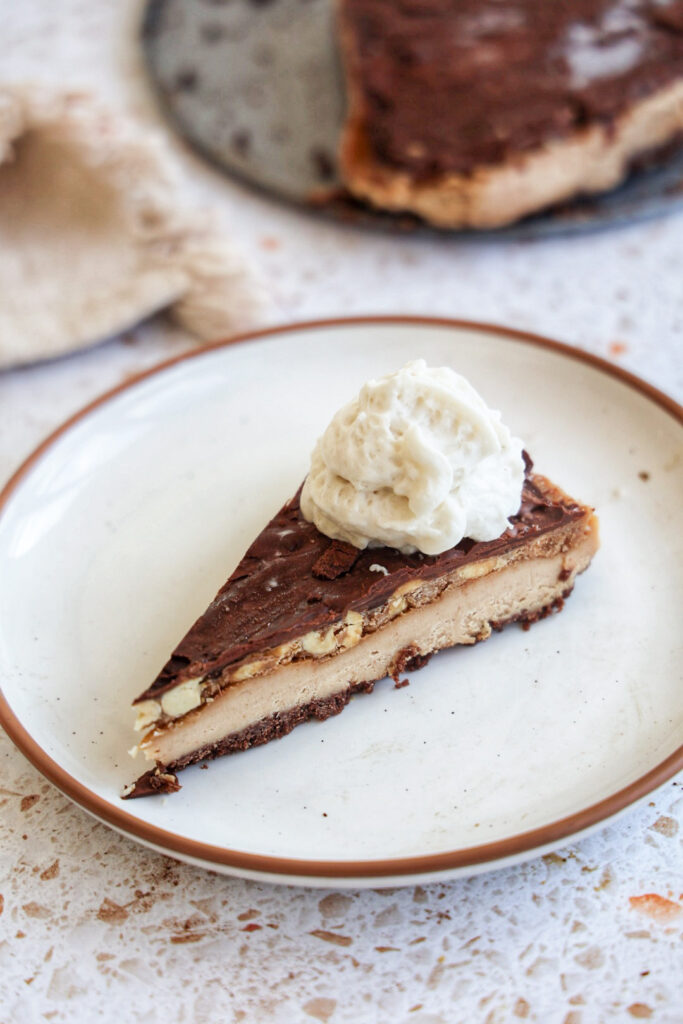
- The LAYERS! This is one of those cheesecakes that is definitely easy on the eyes 😉 It has an oaty base, a rich peanut butter cheesecake filling, gooey caramel with crunchy peanuts, and is topped with chocolate.
- It’s easy: I feel like raw vegan cheesecakes can seem pretty intimidating, but it’s incredibly easy! The caramel layer takes the longest, but is sooooo worth it!
- It’s gluten free, refined sugar free, and made with wholesome ingredients!
Ingredients and substitutions
- Peanut Butter: This is going to make up the base of the cheesecake. If you can’t have peanut butter, you can swap almond or cashew, however, peanut butter will give the most authentic snickers flavor! I make sure to use a peanut butter that is simply just peanuts or peanuts and sea salt.
- Maple Syrup: This will be the sweetener of the recipe. You can swap any sticky sweetener you like.
- Chocolate chips: You can use whatever you have on hand. I love Hu Kitchen. You can use “danishealthyeats” for a discount.
- Coconut milk: You’ll want to use full-fat canned coconut milk. If you can’t have coconut, you can use heavy cream.
- Peanuts: You can swap in another nut of choice if you can’t have peanuts!
- Oats: Oats are the base of the cheesecake. You can also use nuts instead. Just pulse them in the food processor until they’re almost flour-like or in tiny bits. Then add the remaining ingredients & process again.
Storing & Serving the cheesecake
You’ll want to store the cheesecake in an air-tight container in the freezer. It’s best when you let it thaw for 10 minutes or so before enjoying!
Other candy-inspired recipes you’ll love
- Vegan Snickers Protein Bars
- Healthy Pecan Snickers Bars
- Healthier Vegan Butterfingers
- Snickers Chia Pudding
- Vegan Almond Joy Bars
Vegan Snickers Cheesecake
Ingredients
Base
- 1 cup old-fashioned rolled oats
- 3/4 cup almonds *or other nut. Pecans work great! Can sub sunflower seeds for a nut-free option.
- 1/4 cup maple syrup
- 2 tbsp coconut oil melted
Cheesecake layer
- 1 cup cashews *soaked in hot water for at least 20 mins
- 1/3 cup peanut butter
- 3/4 cup full-fat or light canned coconut milk
- 1/3 cup coconut yogurt *or greek yogurt. I like unsweetened vanilla
- 1/4 cup maple syrup
- 2 tbsp coconut oil melted
- 2 tbsp lemon juice
- 1 1/2 tsp vanilla extract
- pinch of sea salt
Caramel Layer
Chocolate Layer
- 1 1/2 cups chocolate chips
Instructions
Base
- Grease an 8” spring form cake pan.
- Add the base ingredients to a food processor, processing until it becomes a dough. If your mixture doesn't hold together, add a tbsp or two of water & process again.
- Pour the mixture into the bottom of a lined/greased 9" pie pan and press it down firmly. Set aside.
Cheesecake Layer
- Combine everything in a blender and blend for a minute or so until super smooth. Taste and adjust as you'd like. Pour over the cookie base. Place in the freezer for 40 minutes to an hour until the cheesecake layer is slightly firmed.
Caramel
- While the cheesecake is firming up, making the caramel. Add the coconut milk, water and coconut sugar to small pot over medium heat, bringing it to a boil, being sure to stir very frequently.
- Turn down the heat a little, letting the mixture simmer for 15 to 20. You'll want to stir every so often so the mixture doesn't burn.
- The mixture will start to darken in color and reduce to a caramel consistency. Remove it from the heat and stir in the peanuts. Then, let it cool a few minutes, it'll thicken up while it cools as well.
- Once it's cooled down, pour the caramel over the cheesecake layer, gently spreading it out evenly. Sprinkle over the chopped peanuts.
Chocolate layer
- When ready to make the chocolate layer, add the chocolate chips to a heat-proof bowl with the coconut oil. Heat in 20 second increments, stirring well between each one, until smooth. Pour it over the caramel layer, quickly spreading it over top.
- Top with sea salt and place back in the freezer for at least 4 hours-overnight before cutting into slices.
can I make this 2 days in advance and have it still be good?!
Hi! Yes, if you cover it and store it in the freezer! Then let it thaw at room temp for 30 or so minutes when ready to eat!
Can the oats be replaced with sliced almonds?
Hi Madison! I haven’t tried that but yes, I think it’d work!